1. Set up in VandaClinic
Create a new company
- In VandaClinic, Click on the setting icon
- Under Registration, Click on “Company”
- Create a new company

2. Set up in VandaManager
Create new packages
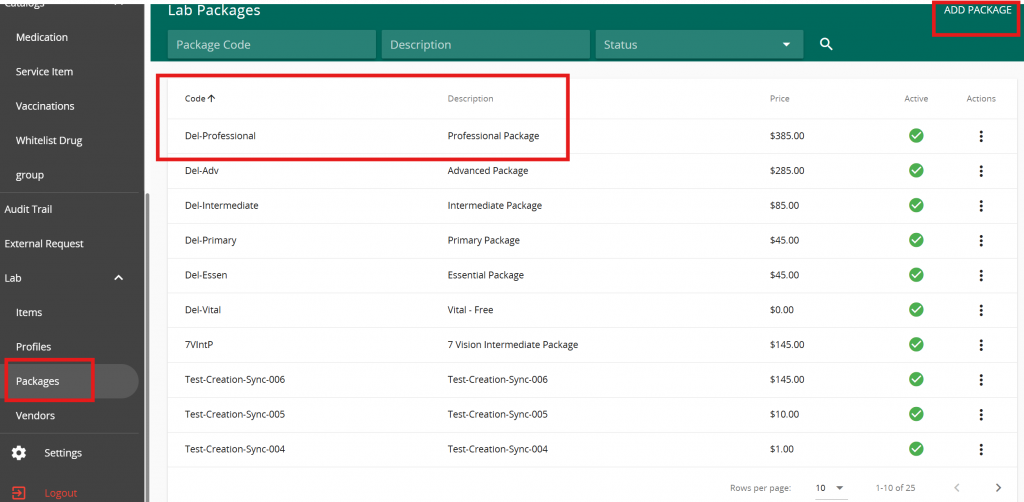
In VandaManager, head on to “Packages” under “Lab”. Click on “Add Package” and fill in the necessary information
Note that the code & description are important information which will be utilised in form creation
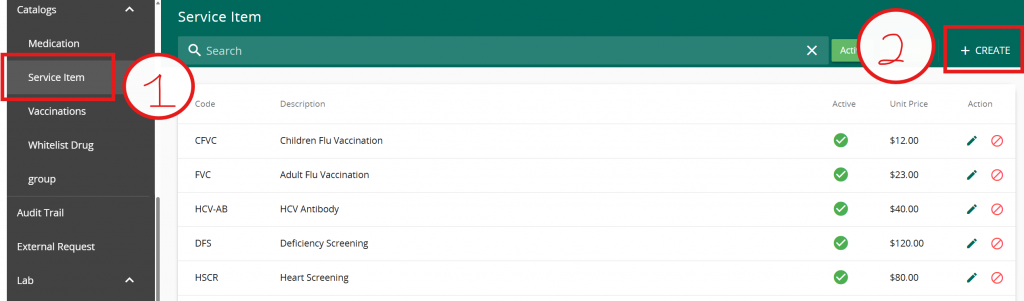
If a new service/vaccination/add ons is being introduced, Click on “Service Item” and create a new item
3. Set up in VandaCare
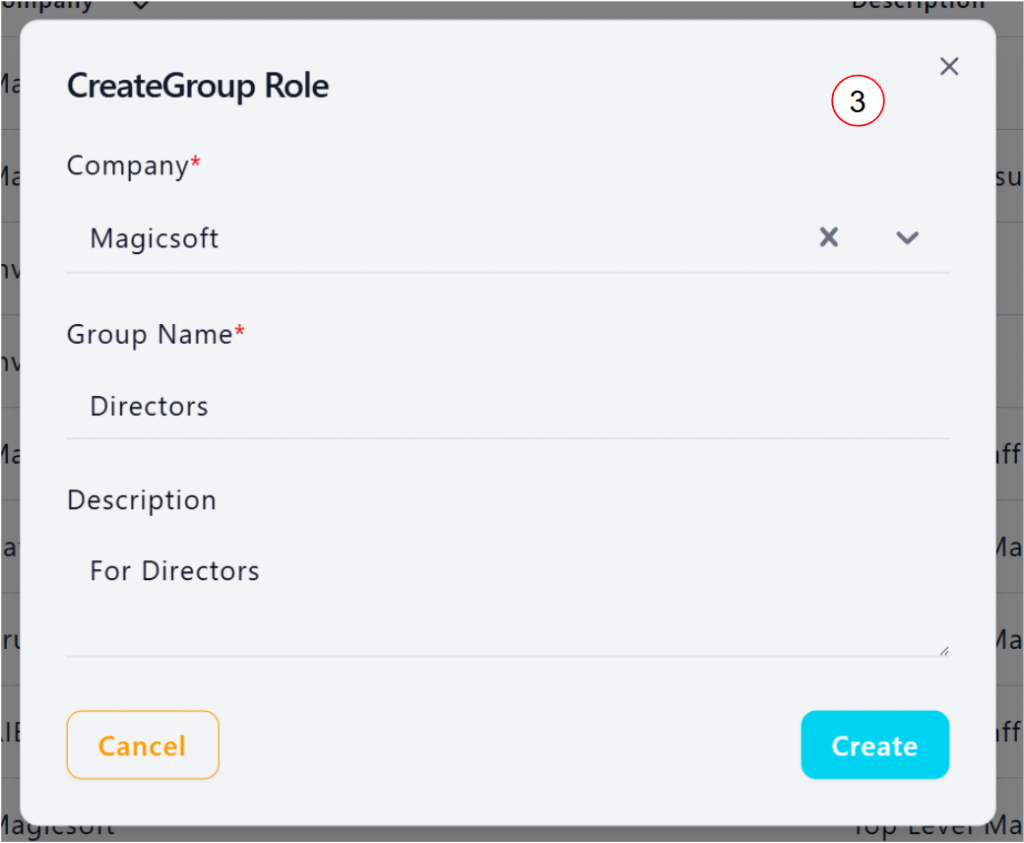
Company Group Role setups
1. Head to “Group Roles” under User Management
2. Click on “+ Group Roles”
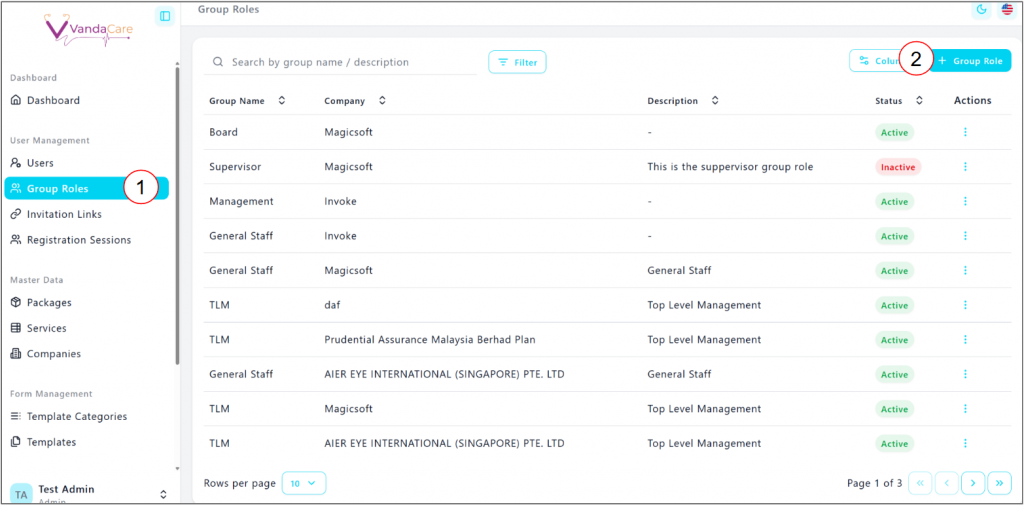
3. Create group roles to be assigned to users and forms. Create at least one so that form and user set ups can have a selection.
Create a form
Start with creating a template category
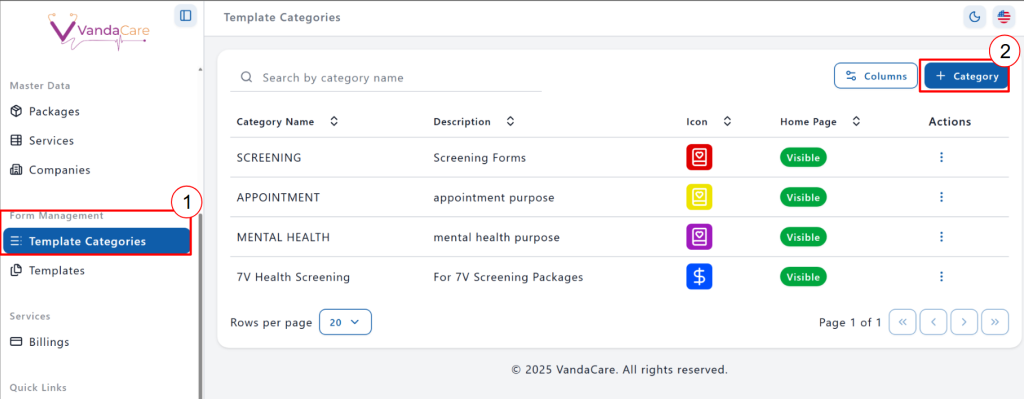
1. Click on “Template categories” update Form Management
2. Click on “+ Category”
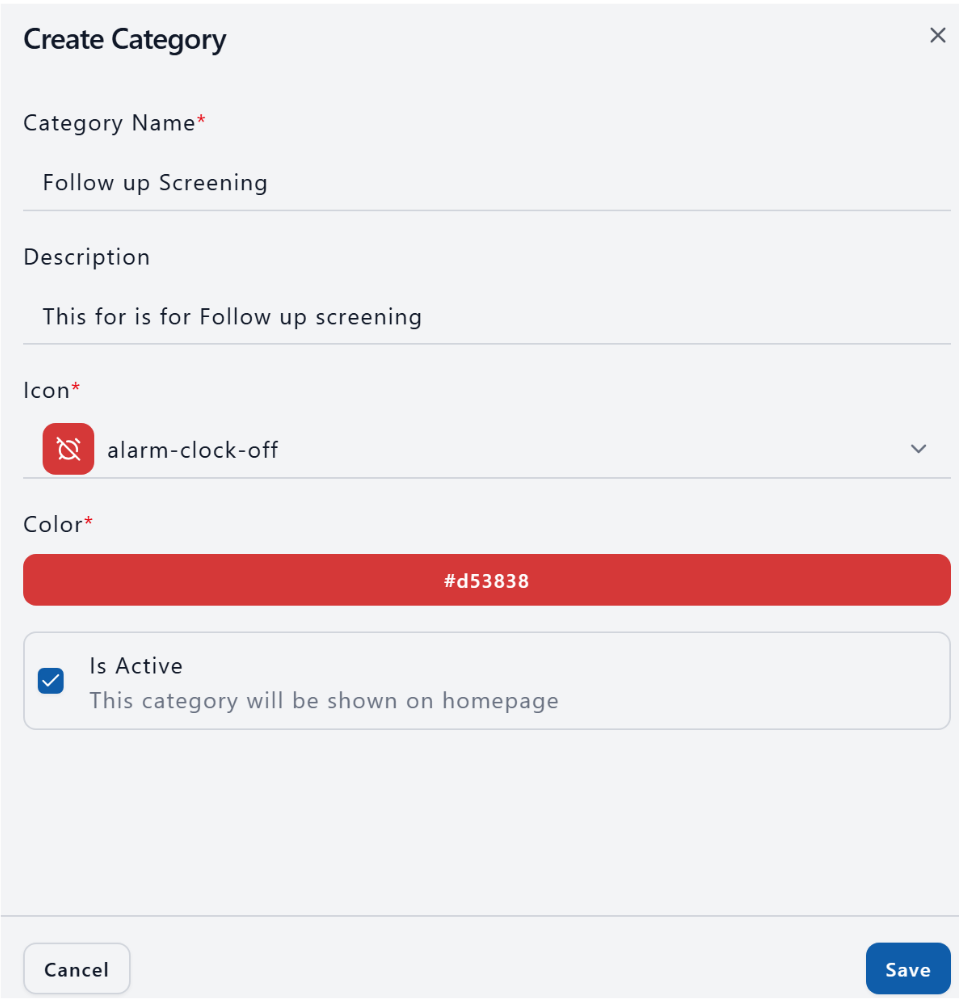
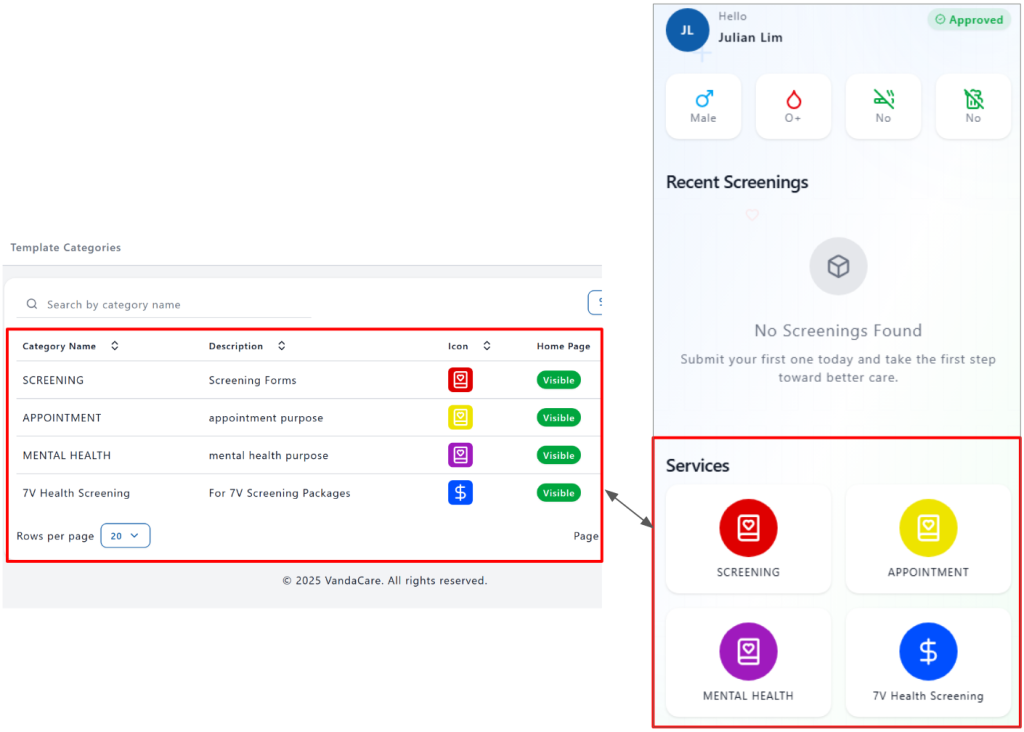
Fill in the inform required. Note that “Category Name” will be shown in the services available. Refer to the screenshot below
Create/ Edit Template
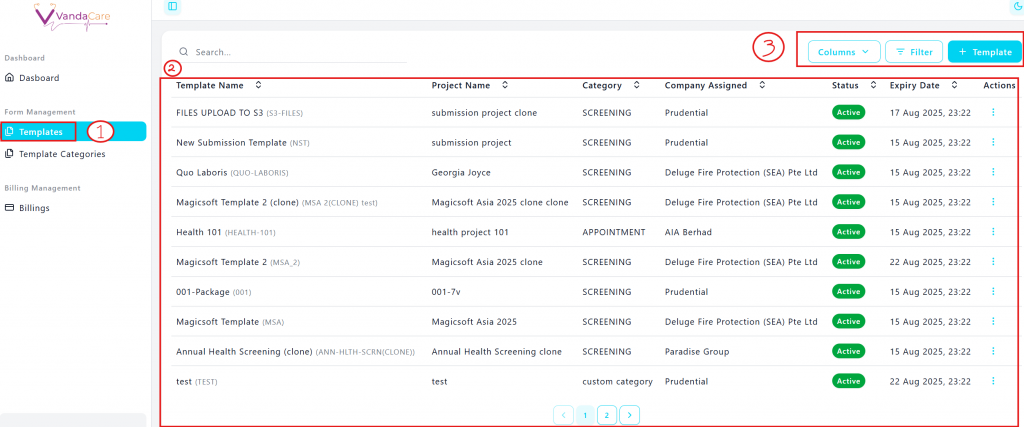
1. Click on “Templates” under Form Management
2. A list of existing template will appear. Users can sort the templates via the column headers. A search feature is placed at the top of the page to search for specific forms.
3. Click on the ” + Template” to begin creating a new form
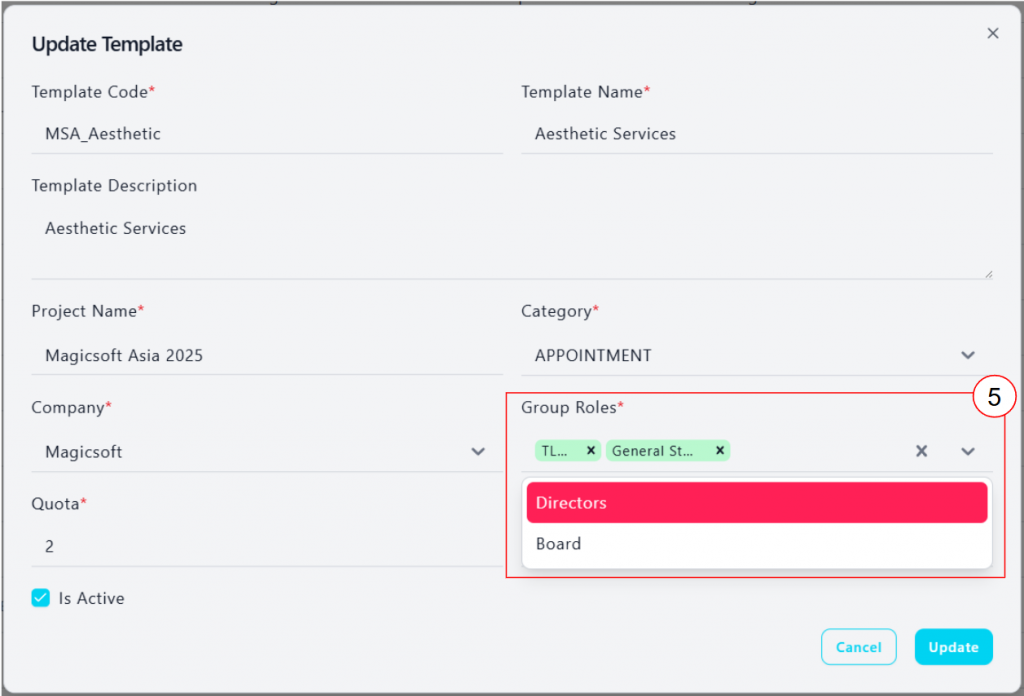
Users can manage the template details in the following screen. Users should take note of important information such as:
- Selection of form category (created in the first step). This will determine the category which the form will be displayed in for the patient to select
- Company selection as this will assign the form to the specific company
- Expiry date & time as this will impact the form’s availability
- Group roles as this will affect which users have access to the form
After filling in the template information, click on the “action button” in the templates list
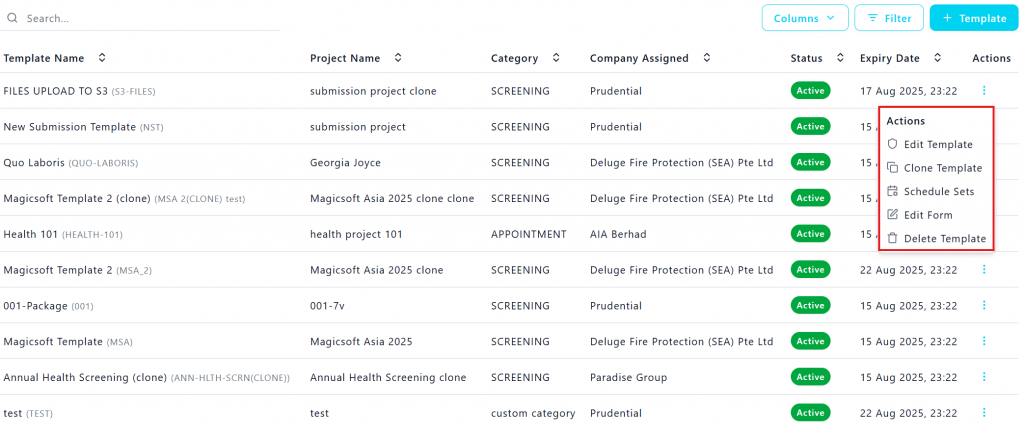
In the action list, click on “Schedule Sets”
Schedule sets allow users to set up the appointment time relevant to the forms. Once user click on “schedule sets”, a list of existing schedules will be displayed
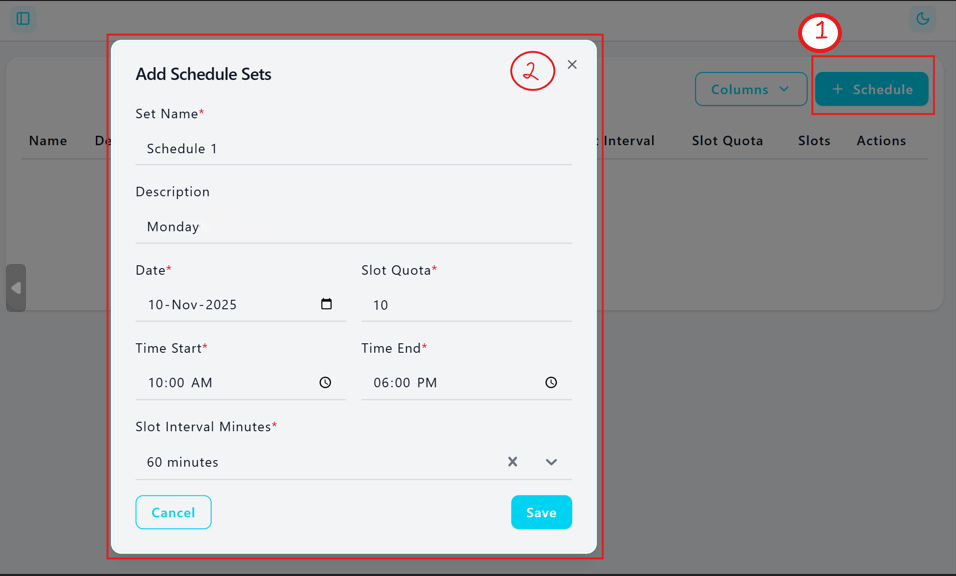
- Click on the ” + Schedule” on the top right of the page to add a new schedule
- Fill in the information in the following image to set up the appointment schedules
Do note that the Slot interval minutes will be automatically generated by the system to ensure that the timeslots are generated equally within the start and end time
After setting the schedule sets, return to the templates page, under the action lists, click on “Edit form”
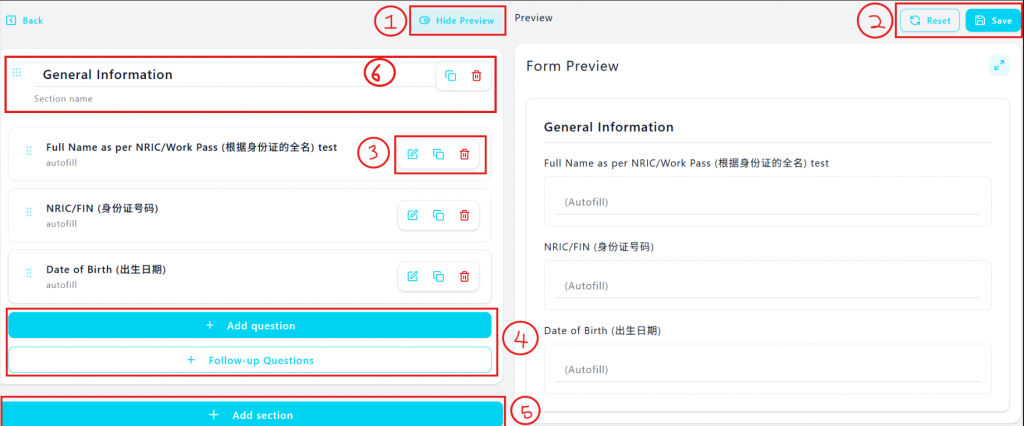
This segment allows users to craft the forms based on the questions they need. When selected, Users will enter the form with a few general section set up and the form preview triggered.
- User can toggle the “Hide preview” to close the preview of the form
- User can select “Reset” to remove all changes made to the form prior to saving. User can select “Save” to finish editing the form
- Each questions will have 3 action buttons, starting from the left – Edit (question edits), Duplicate question, and Delete question
- User can add new questions or add follow-up questions (set dependencies)
New Questions
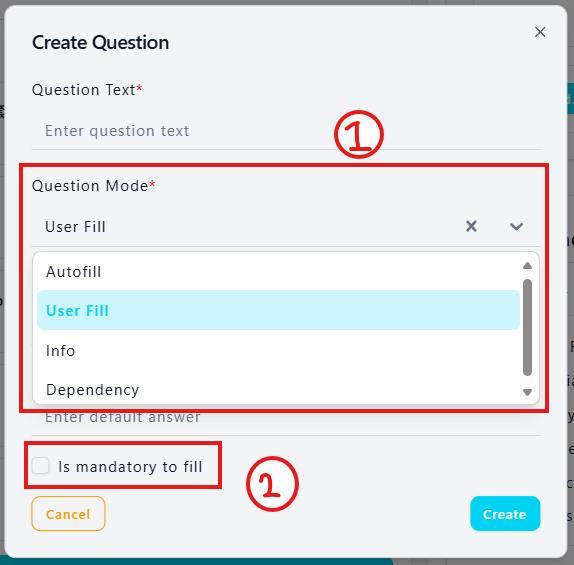
When creating or editing new questions:- Users will be required to select the following question mode:
- Auto fill
- User field
- Info
- Dependency
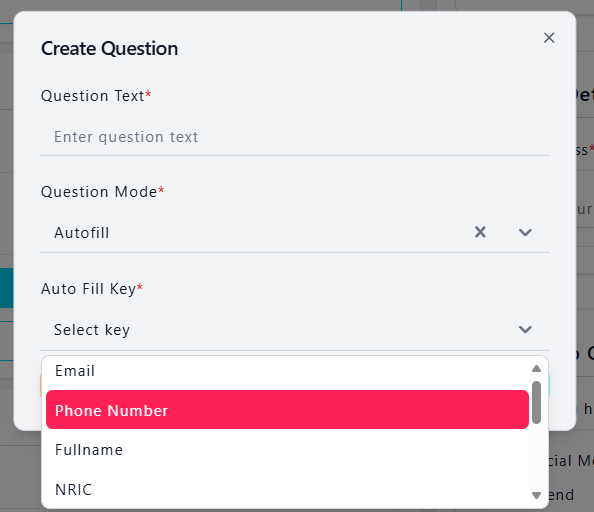
Autofill will automatically draw data from patient’s existing information such as:
- Phone number
- Full Name
- NRIC
- Birth Date
- Company
- Gender
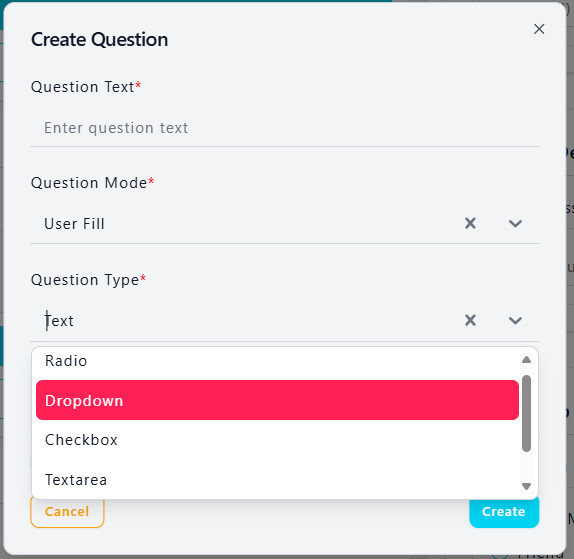
User fill are questions which requires patients to manually fill in their answers.
Users will be required to select the question type which includes:
- Radio ( 1 answer only)
- Checkbox (multiple answers)
- Text Area (Long answers)
- Text (Short answers)
Do note that for radio & checkbox question types, users will be required to set up the answer choices.
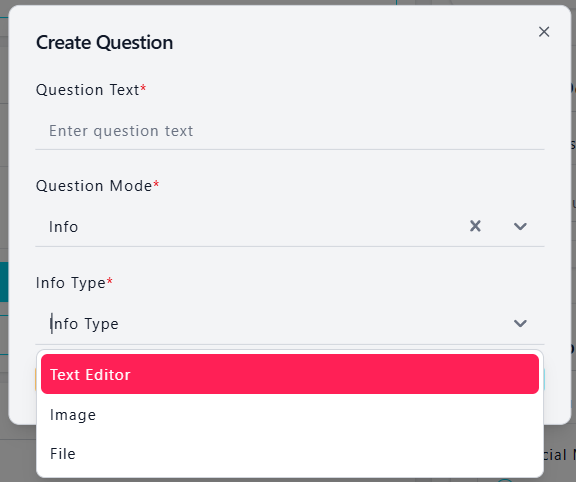
Info type questions do not require any input from the patients.
Users are able to share information with their patients through this question type. Users can choose to share:
- Text
- Media
- File
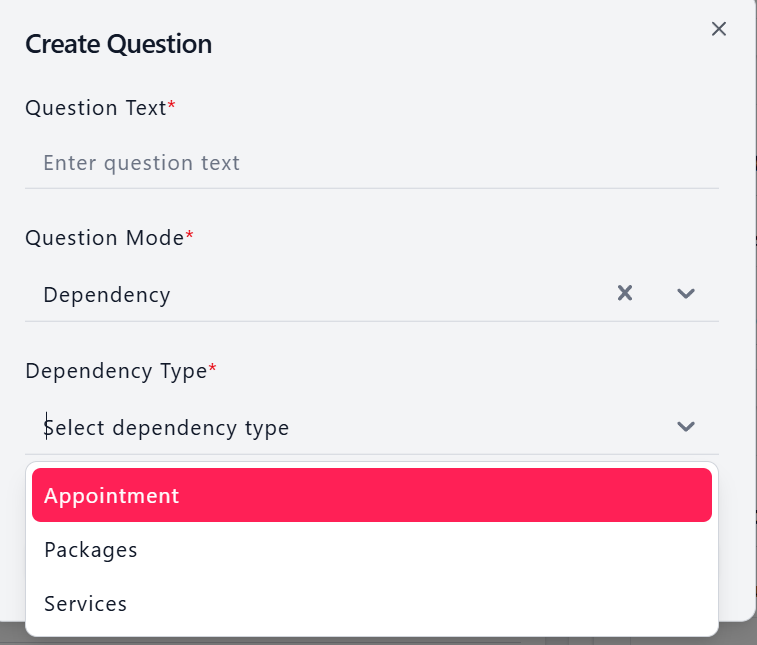
Dependency type questions refers to questions which requires master data such as:
- Appointment
- Packages & Services
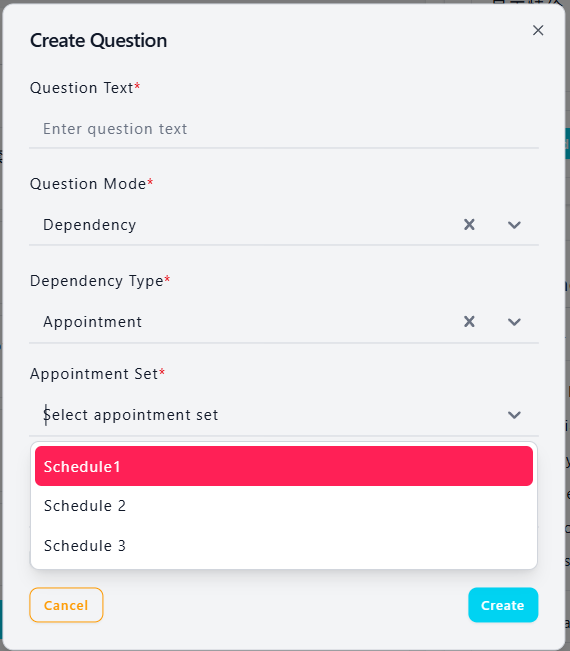
1. Appointments
Users will be required to select dependency type: appointment followed by selecting the “Appointment Set”.
*If you do not see any option here, you will need to head to “schedule set” to setup an appointment period
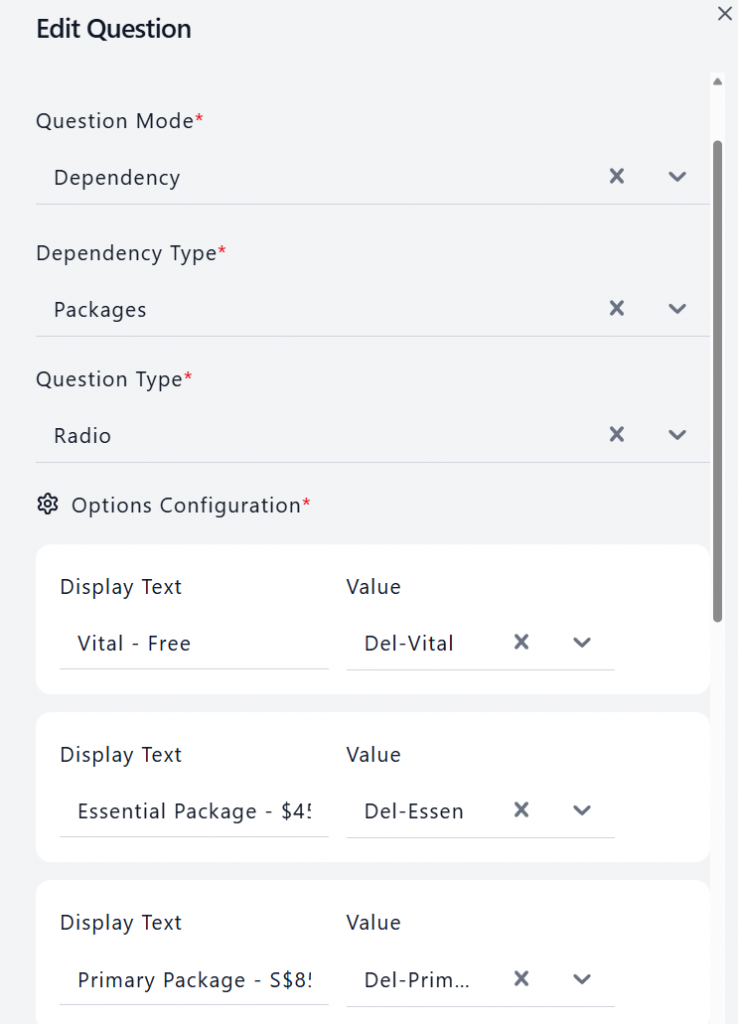
2. Packages & Services
Packages created in VandaClinic will be synchronised into VandaCare. After choosing either package or service in the “dependency type” selection, select the relevant package/service code under “value” and the description will appear in the “display text”. Change the display text as needed.
Follow-up Question (conditional formatting)
Currently the conditional formatting applies to User filled question type – Radio
It is important to create the follow-up question before attempting to set the follow up question
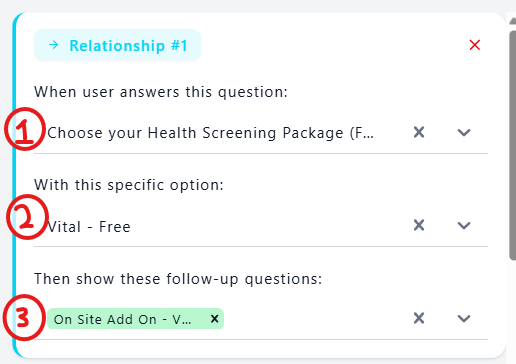
1. User will need to select which question is answered
2. Followed by the answer selected
3. Which follow up question will be triggered.
4. Further company setup & Registration
- Head to “company”. You should be able to see the list of all the companies created in VandaManager
- Click on the 3 dot menu under “action” column. You should be able to see “Invitation Iinks” and “Update Logo”
- Update Logo allows user to add the client’s company logo. This will show up in area such as HR Portal
- Invitation link brings user to the invitation page to create invitation links

Update Logo
Simply click on update logo and upload the image to be used as company logo
![]()
Invitation link/ E-mail invitation
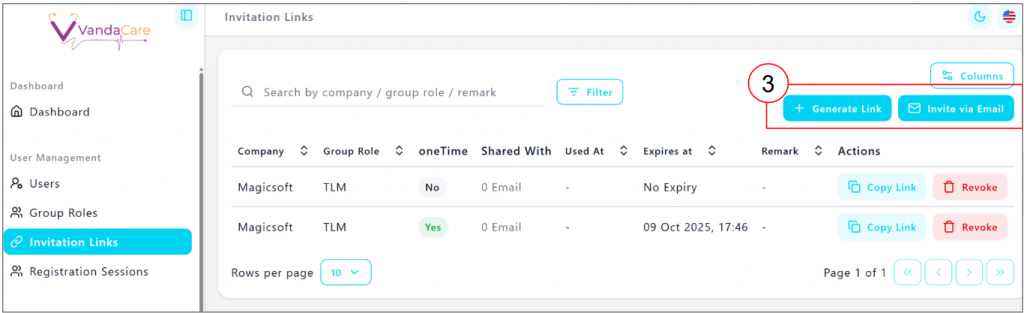
For Invitation Link:
- Select the company relevant to the invite link
- Select the group role
- Set the expiry date & time
- Set whether the link is one time use or can be repeated
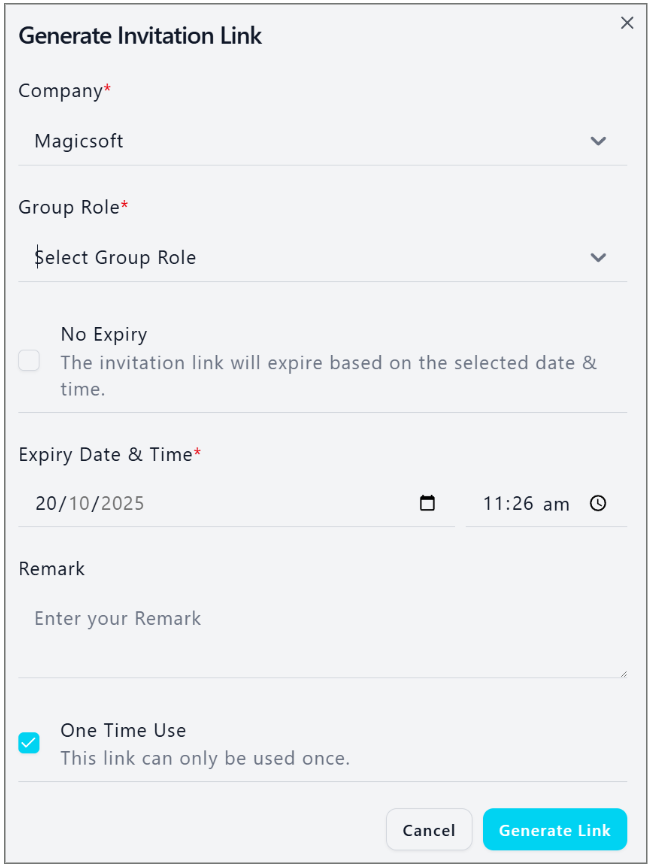
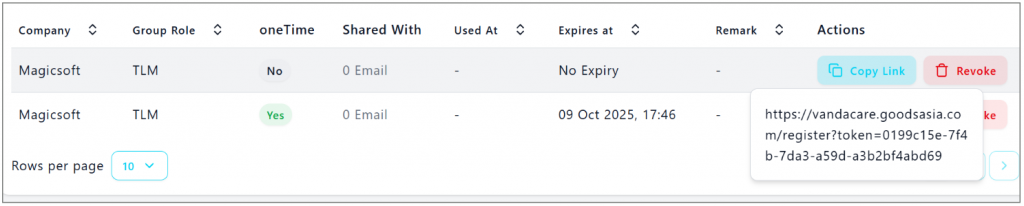
Click on “Generate Link afterwards” and you will be able to see the new invitation in the list. Click on “Copy URL” to send the url to your user.
For email invitation:
- input the email address
- Select role
- set invitation expiry
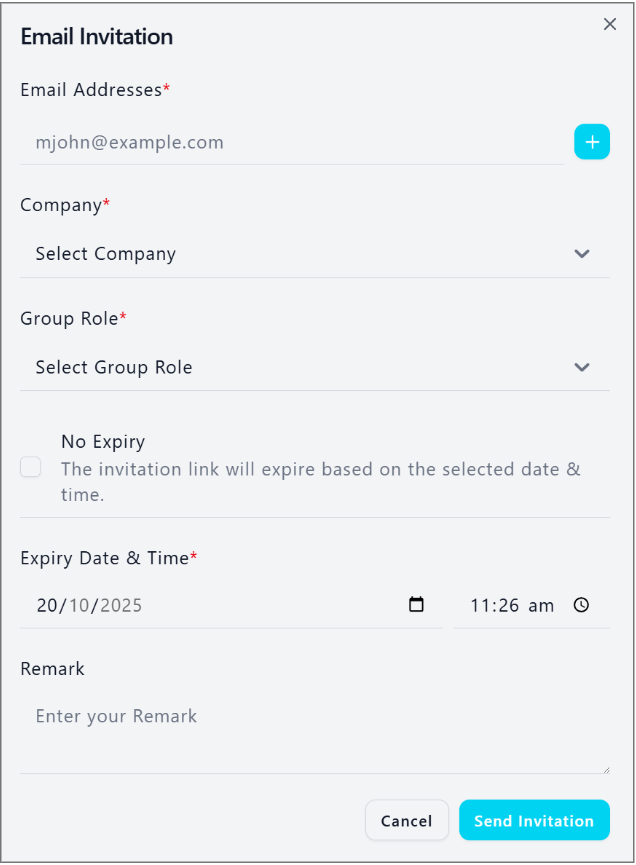
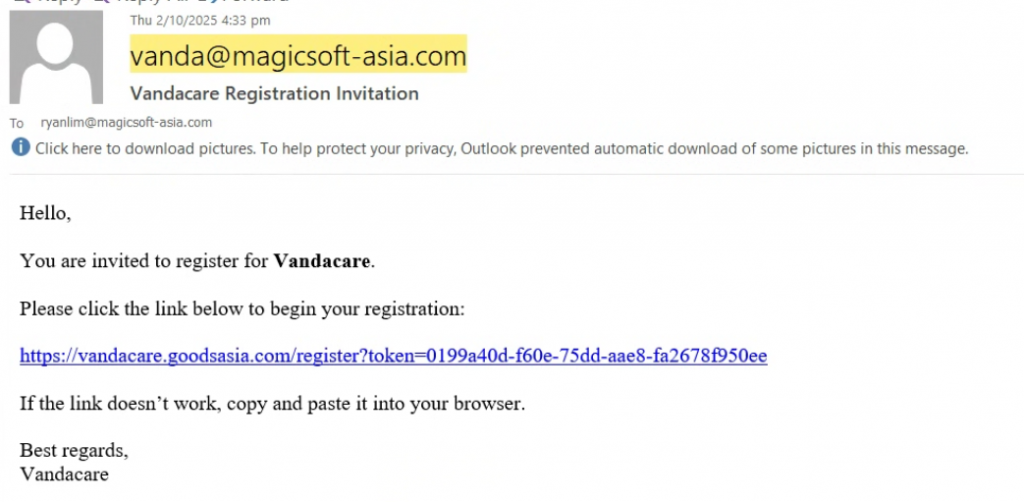
After clicking on “Send invitation”, an invitation link will be sent to the user’s email
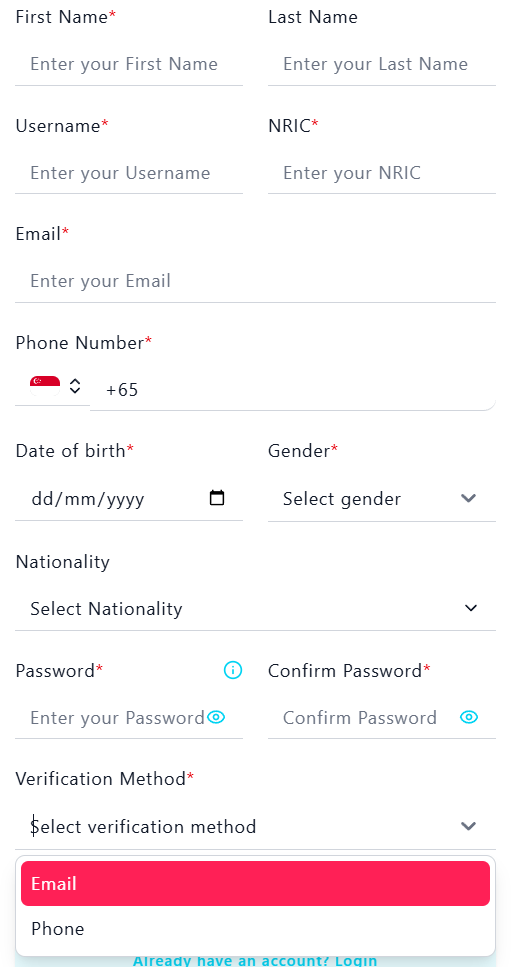
The registration page has been updated to remove marital, blood group and address information. User may select email or sms verification.
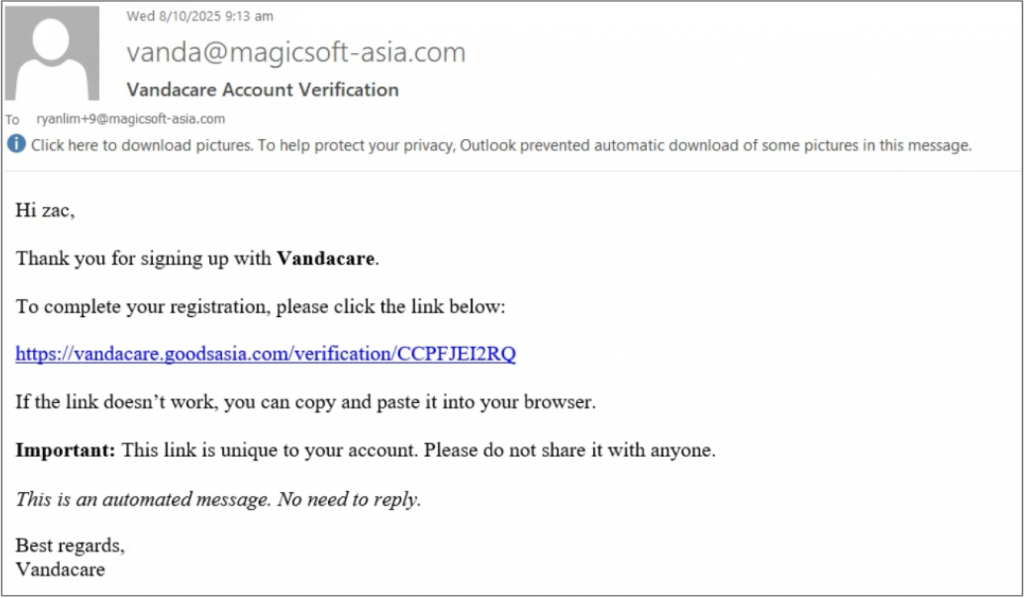
An email/sms will be sent to user aftterwards.
After Registration
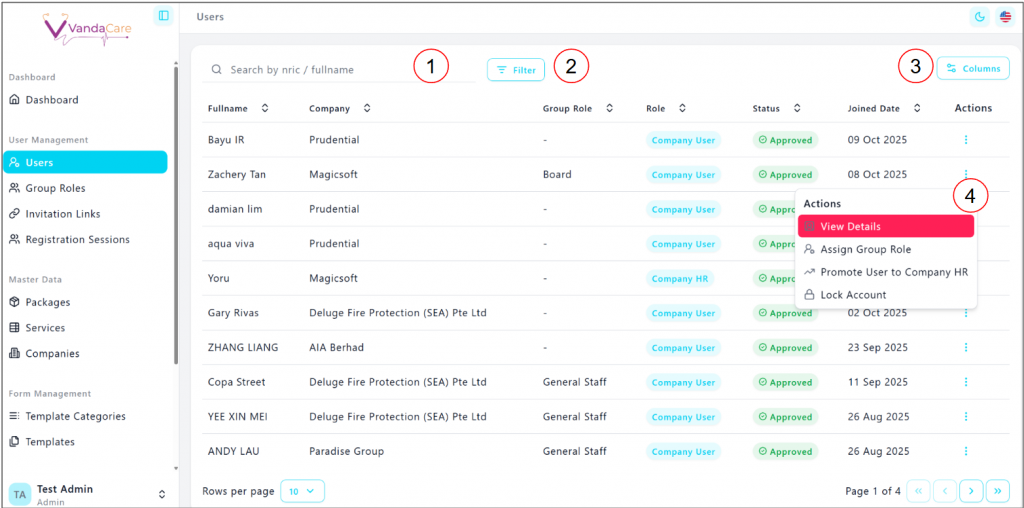
After user have successfully registered, their account will show up in the user list.
In the user list:
- Search for user using NRIC or full name
- Filter the user list
- Change the visible columns
- In the action menu, view patient details, Assign company group role, manage user permission and lock account.
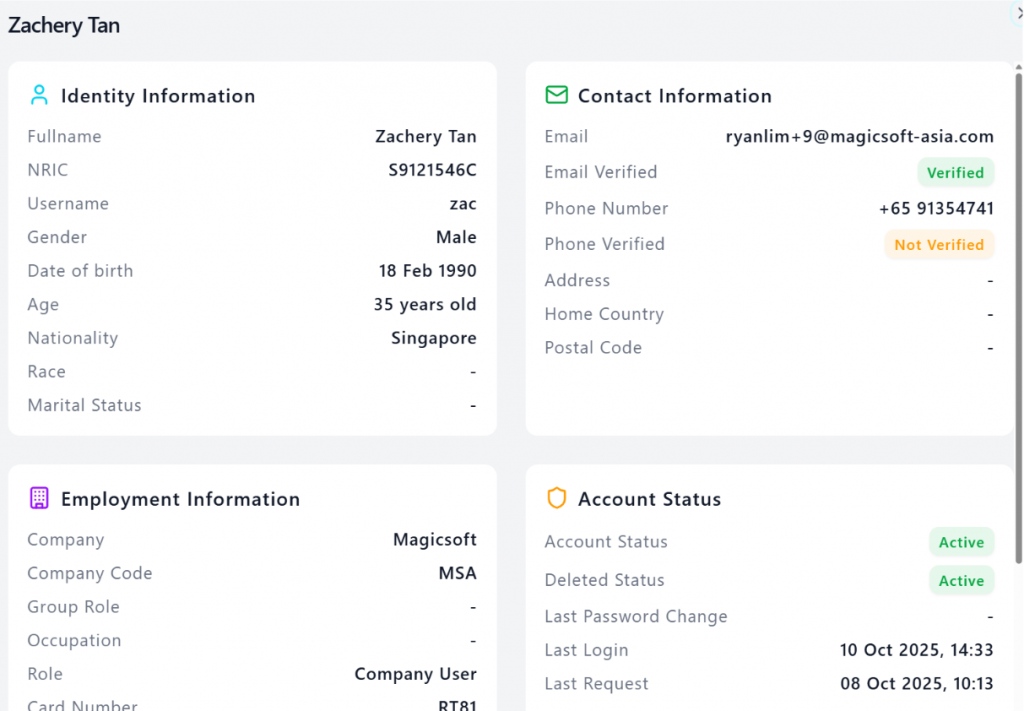
Patient information:
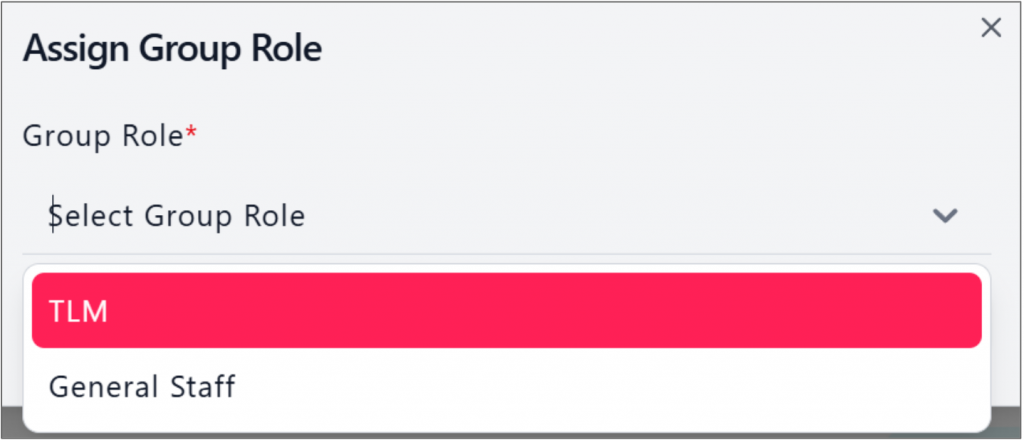
Assign group Role:
Manage user permission:

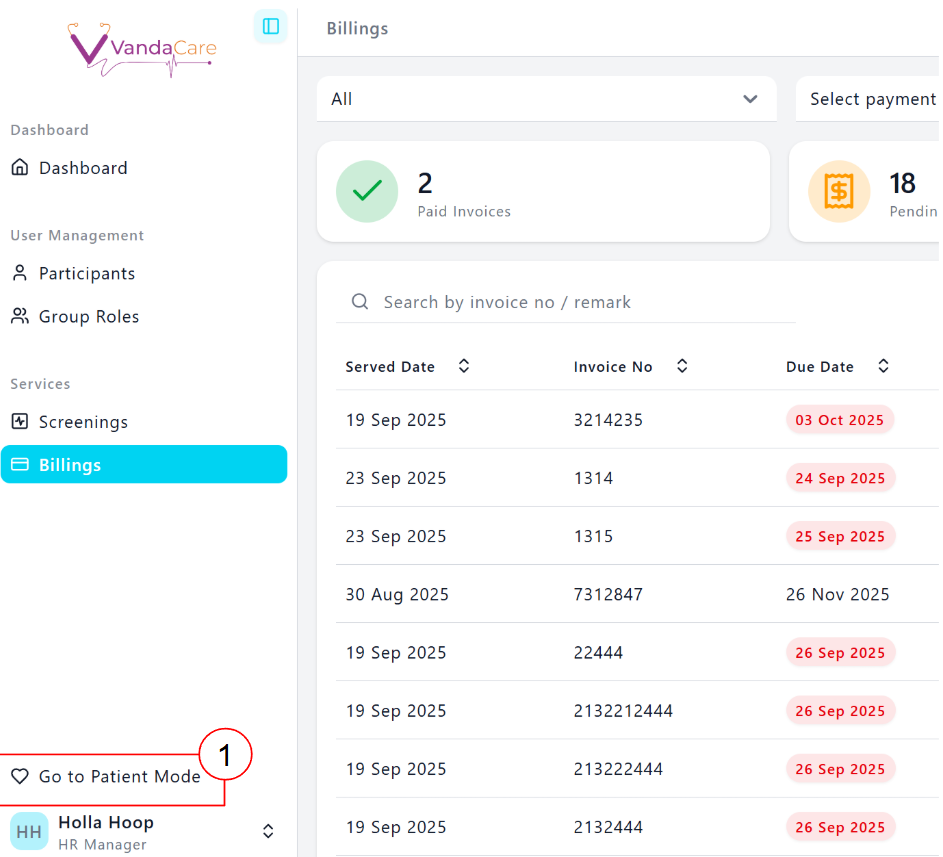
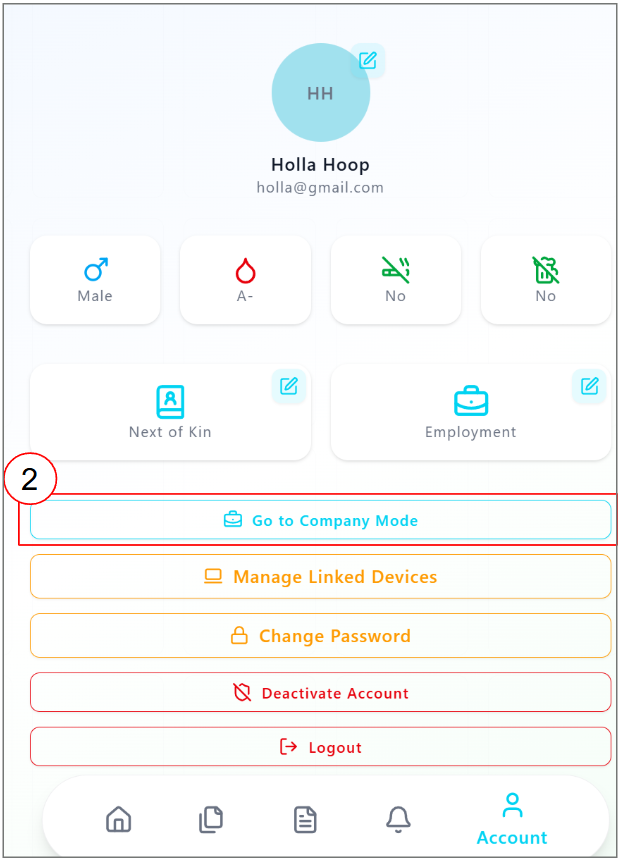
If a user has HR permission, they can toggle their account view:
Screening Request
To begin a screening request
- Head to VandaCare and login into a patient account. Click on the “Screening” Icon
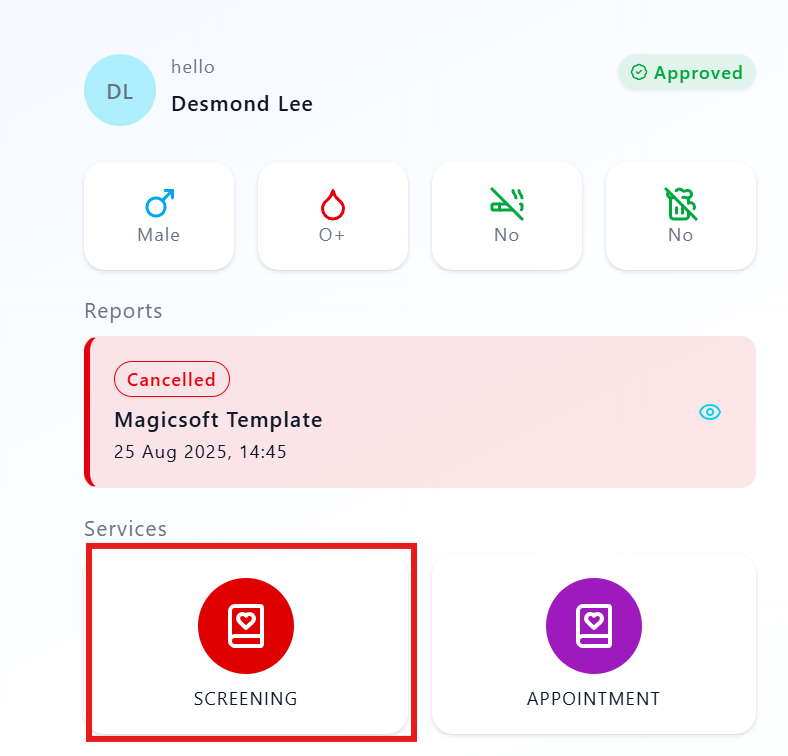
2. A list of forms assigned to the patient’s company will appear. Click on the relevant form to start filling in the screening request

Review of Request
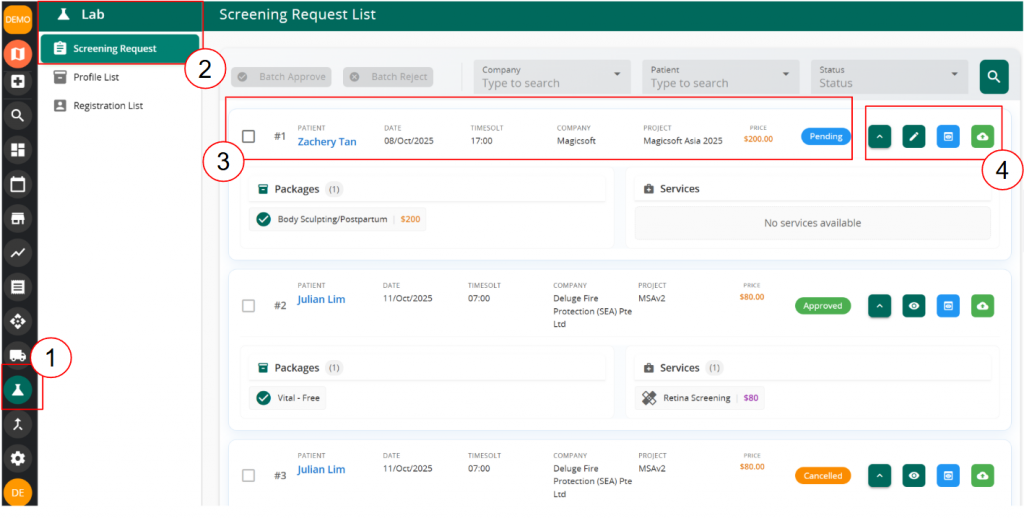
Once the patient have filled in the form, User will be able to review the request in VandaClinic
- Head to VandaClinic, Click on the lab icon
- Click on Screening Request
- A list of screening request will appear and user may review the services and packages requested
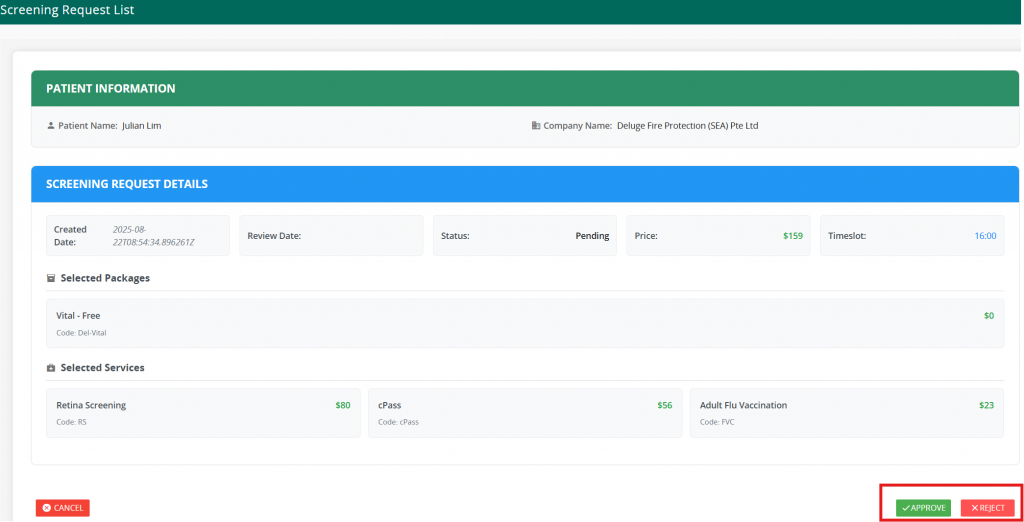
- Actions button: Click on the eye icon to preview the submitted request whilst the pencil icon showcases summarised details and allows approval or rejection of request
Review the submitted request:
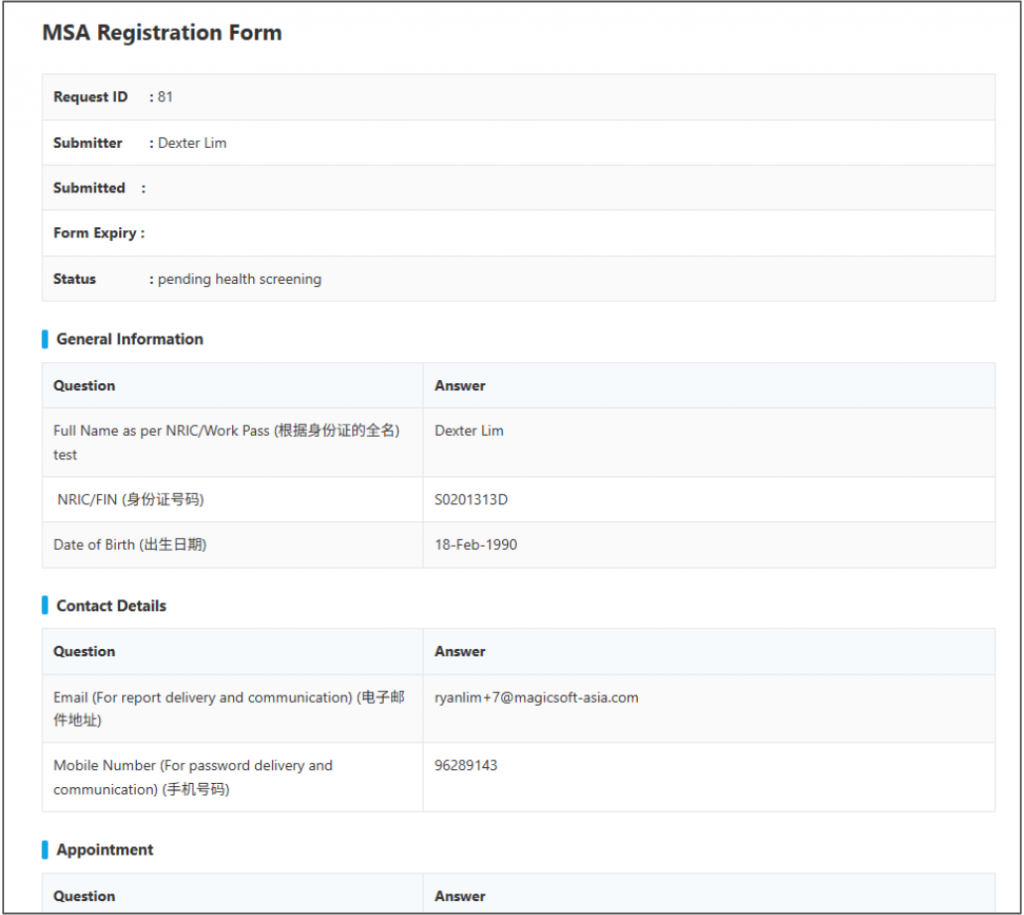
After reviewing the request, User may approve or reject the requests:
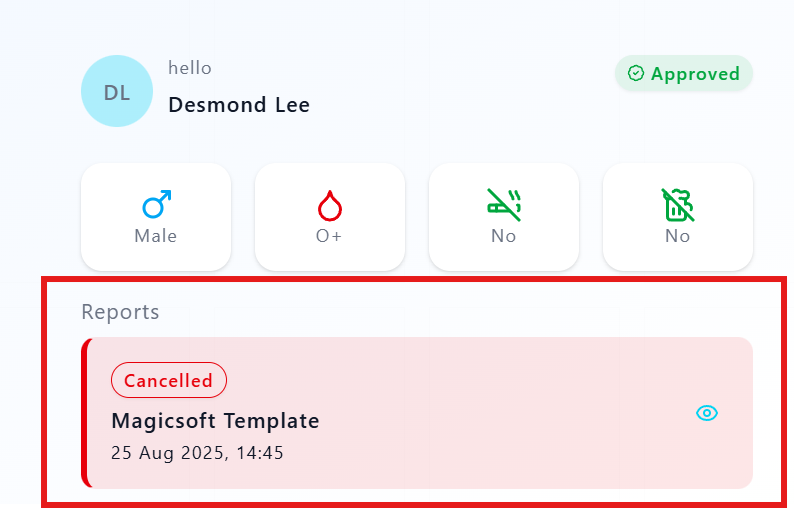
Status updates
Once the request have been approved or rejected, patients will be able to see the Screening Request status as below
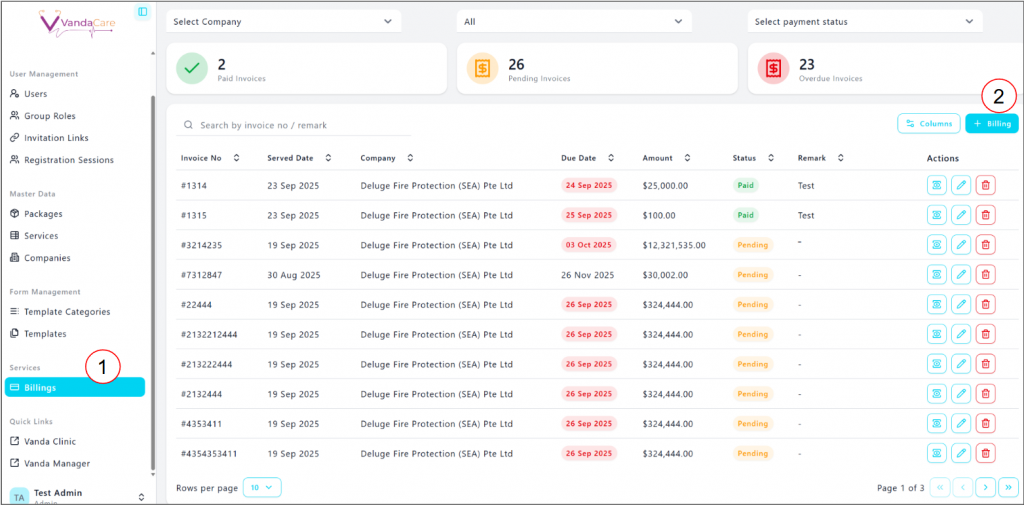
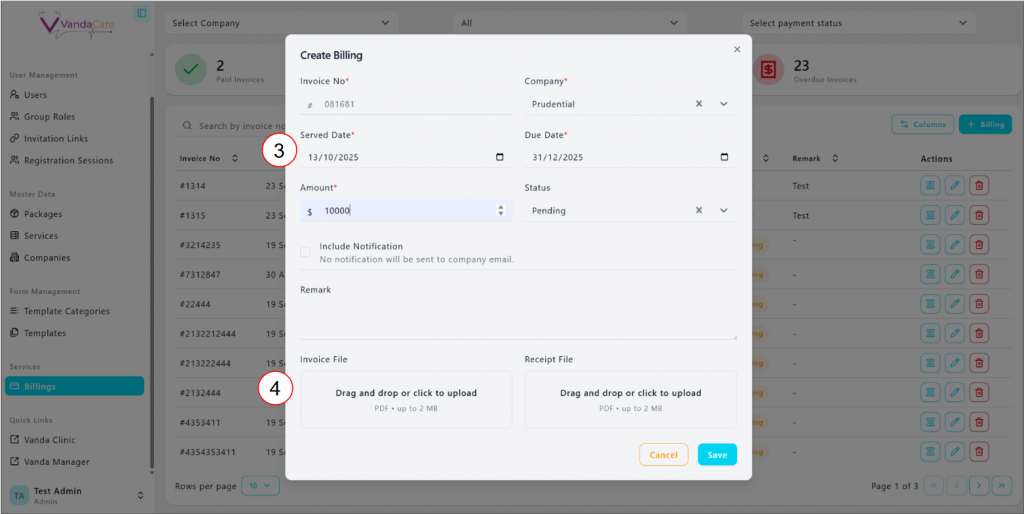
Billing
Once the screening is almost done, Administrators can conduct billing in VandaCare.
- Head to VandaCare -> Login as admin -> Billing
- Click on “+ Billing”
3. Fill in the invoice details. Select “Include notification” for a weekly notification sent to the HRs”
4. Upload Invoice & receipt files
5. In the HR portal, they will be able to see the list of billings sent to them and preview the invoices/receipt 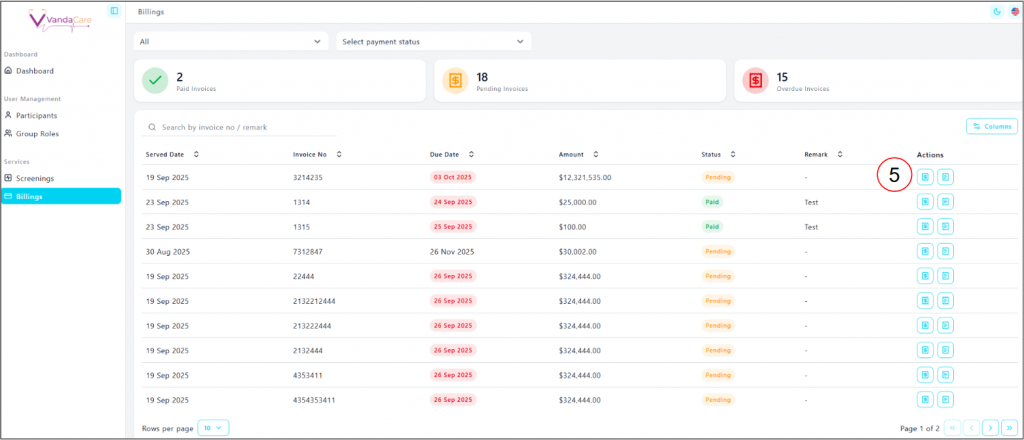
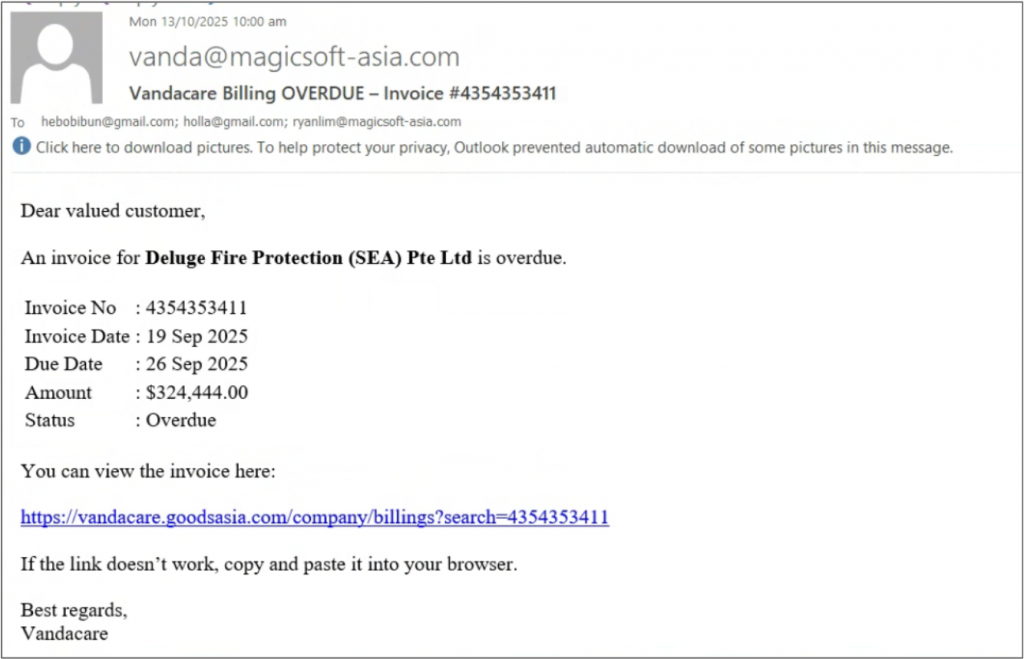
An example of the weekly notification: